Made in Pennsylvania, USA 🇺🇸 by Breakfast

Coral Bridge Documentation
How to automate the creation of Contacts and Deals in HubSpot CRM from Gravity Forms submissions and WooCommerce orders. Purchase Coral Bridge and get started today.
On This Page
INSTALL & CONNECT
Coral Bridge is a WordPress plugin, and purchases unlock access to a .zip file download.
Upload & activate the plugin
First, login to the WordPress administrative dashboard.
- Upload the .zip file at Plugins -> Add New Plugin -> Upload Plugin, or unzip the compressed plugin file and upload the coralbridge directory to the wp-content/plugins folder.
- Activate Coral Bridge in the Plugins list.
- If you will send Gravity Forms submissions to HubSpot, activate Gravity Forms. If you will send WooCommerce orders to HubSpot, activate WooCommerce.
- Visit Settings -> Coral Bridge.
Copy license key and activate the site
- Visit the Membership Account page at breakfastco.xyz/membership-account and copy the License Key.
- Visit Settings -> Coral Bridge in the WordPress administrative dashboard and paste the license key.
- Press the Save Changes button.
Create & load HubSpot credentials
- Login to hubspot.com.
- Copy the Portal ID below the company name in the global toolbar menu (or on this page) into the matching field on the Coral Bridge settings page.
- Create a Legacy App in HubSpot at Settings -> Integrations -> Legacy Apps.
Legacy Apps aren’t going anywhere, and HubSpot recommends to keep using them as of September 2025. We’ll be among the first to know when a new platform is ready for our integration. - Obtain an Access token with these scopes:
crm.objects.contacts.read,crm.objects.contacts.write,crm.objects.deals.read,crm.objects.deals.write,crm.objects.owners.read,files, andtickets. - Copy the Access Token to the matching box on the Coral Bridge settings page.
- Press the Save Settings button to validate and save the credentials.
Coral Bridge is now active and ready for Gravity Forms feed configuration or WooCommerce order sync.
Gravity Forms
Gravity Forms feeds send form submissions to HubSpot. Add a Contacts feed when you only need to create or update contacts. Add a Deals feed when a form submission should create or update a contact and create a related deal.
HubSpot Contacts Feed
Creates or updates HubSpot CRM Contacts when forms are submitted.
- Login to the WordPress administrative dashboard.
- Visit the Forms menu and choose a form to integrate with HubSpot CRM.
- Visit the form’s Settings -> HubSpot Contacts menu in the row action links on the forms list, or edit the form and choose Settings -> HubSpot Contacts.
- Press the Add New button to create a new feed.
- Choose a name for the feed like “HubSpot Contacts Feed 1”.
- Map form fields to HubSpot Contact fields for Email, First Name, Last Name, Phone, Street Address, City, State/Region, Postal Code, Country/Region, and Contact Owner.
- Map form fields to any other Contact property using the Contact Properties field map. This list contains every Contact property like Additional email addresses, Pipeline, and WhatsApp Phone Number.
- To prevent Contacts from being created based on a user choice on the form, Enable Condition in the Conditional Logic section to define when the feed should run or not run.
- Press the Save Settings button to validate and save the feed.
HubSpot Deals Feed
Creates or updates HubSpot CRM Deals when forms are submitted. Associates new deals with contacts by email address. Creates contacts if email address is not found.
- Login to the WordPress administrative dashboard.
- Visit the Forms menu and choose a form to integrate with HubSpot CRM.
- Visit the form’s Settings -> HubSpot Deals menu in the row action links on the forms list, or edit the form and choose Settings -> HubSpot Deals.
- Press the Add New button to create a new feed.
- Choose a name for the feed like “HubSpot Deals Feed 1”.
- Map form fields to HubSpot Contact fields for Email, First Name, Last Name, Phone, Street Address, City, State/Region, Postal Code, and Country/Region.
- Map form fields to HubSpot Deal fields for Deal Name, Pipeline, Deal Stage, and Deal Owner.
- Map form fields to any other Deal property using the Deal Properties field map. This list contains every Deal property like Amount, Priority, and Deal Status.
- To prevent Deals from being created based on a user choice on the form, Enable Condition in the Conditional Logic section to define when the feed should run or not run.
- Press the Save Settings button to validate and save the feed.
Required Deal Properties
Here’s what HubSpot has to say about required deal properties:
When creating a new deal, you should include the following properties in the request:
dealname,dealstage, and if you have multiple pipelines,pipeline. If a pipeline isn’t specified, the default pipeline will be used.https://knowledge.hubspot.com/properties/hubspots-default-deal-properties
Coral Bridge validates data mappings to ensure deal creation is successful.
Entry Notes
When a Gravity Forms feed runs, a note is saved with the form entry confirming the corresponding change made in HubSpot.
WooCommerce
Coral Bridge can create or update HubSpot Contacts from WooCommerce billing details, or create HubSpot Contacts and Deals from WooCommerce orders.
- Login to the WordPress administrative dashboard.
- Confirm the HubSpot Access Token and Portal ID are saved at Settings -> Coral Bridge.
- Visit WooCommerce -> Settings -> Integration -> Coral Bridge for HubSpot.
- Choose what Coral Bridge should create when an order enters a selected status: Do not sync WooCommerce orders to HubSpot, Create HubSpot Contacts, or Create HubSpot Contacts and Deals.
- Select one or more Trigger Statuses. Coral Bridge runs when an order enters any selected status. The default status is Processing.
- If creating deals, choose the HubSpot Deal Pipeline. Save after choosing a pipeline to refresh the Deal Stage list, then choose the stage for new WooCommerce deals.
- Optionally choose a HubSpot Owner. The selected owner is assigned to both contacts and deals.
- Customize the Deal Name Template if needed, and choose whether Coral Bridge should append
-1,-2, etc. when a generated deal name already exists. - Press the Save changes button.

WooCommerce Contacts
Contacts are matched by billing email address. If a contact already exists in HubSpot, Coral Bridge updates it. If no contact is found, Coral Bridge creates one.
WooCommerce contact sync sends the billing email, first name, last name, phone, street address, city, state/region, postal code, and country/region.
WooCommerce Deals
Deal sync always creates or updates the contact first so the deal can be associated with that contact. WooCommerce deals include the generated deal name, order total as the amount, selected pipeline, selected deal stage, and selected owner when configured.
HubSpot Deal Name
Design the deal name using the following dynamic tags. The default deal name template is {billing_last_name}{billing_first_initial}{order_date:mdy}.
Available tags
{billing_first_name}{billing_first_initial}{billing_last_name}{billing_email}{order_id}{order_number}{order_date:mdy}{order_total}{currency}{status}{site_name}
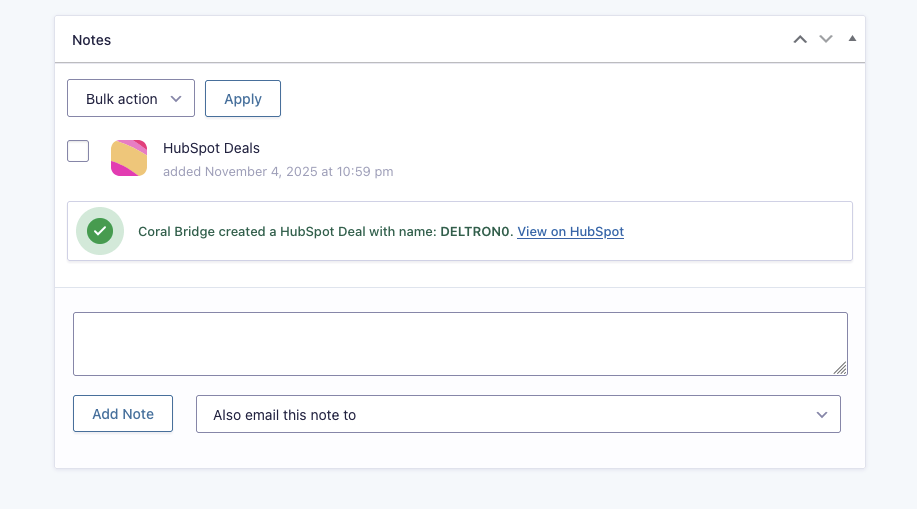
WooCommerce Order Notes
Coral Bridge adds WooCommerce order notes for successful syncs and for errors such as a missing HubSpot access token, invalid billing email address, or HubSpot API failure.